Housing-swapping an Aluminium Apple Watch to Stainless Steel - pt.1
Recently, I checked out the titanium Apple Watches at the Apple Store.

Now the thing is, I currently own an Apple Watch Series 7 in Black Aluminium but I’ve always really liked the stainless steel Apple Watches but could never really justify the price difference. So I thought “Why not just housing swap my Apple Watch the way people housing swap their gameboys?”
So I dug around the internet looking for a Stainless Steel Apple Watch Series 7 housing at a decent price. I came across a few listings on Aliexpress but thought that the pricing was a bit steep for just the housing so I continued my search. I found a local UK supplier that had the housing for £39.60.
Hint: If you’re looking to do this mod yourself, online sellers tend to call this housing part the ‘Stainless Steel Middle Frame’
I watched a YouTube tutorial on swapping the housing on a Series 7 and then ordered the necessary tools as well as the housing itself.
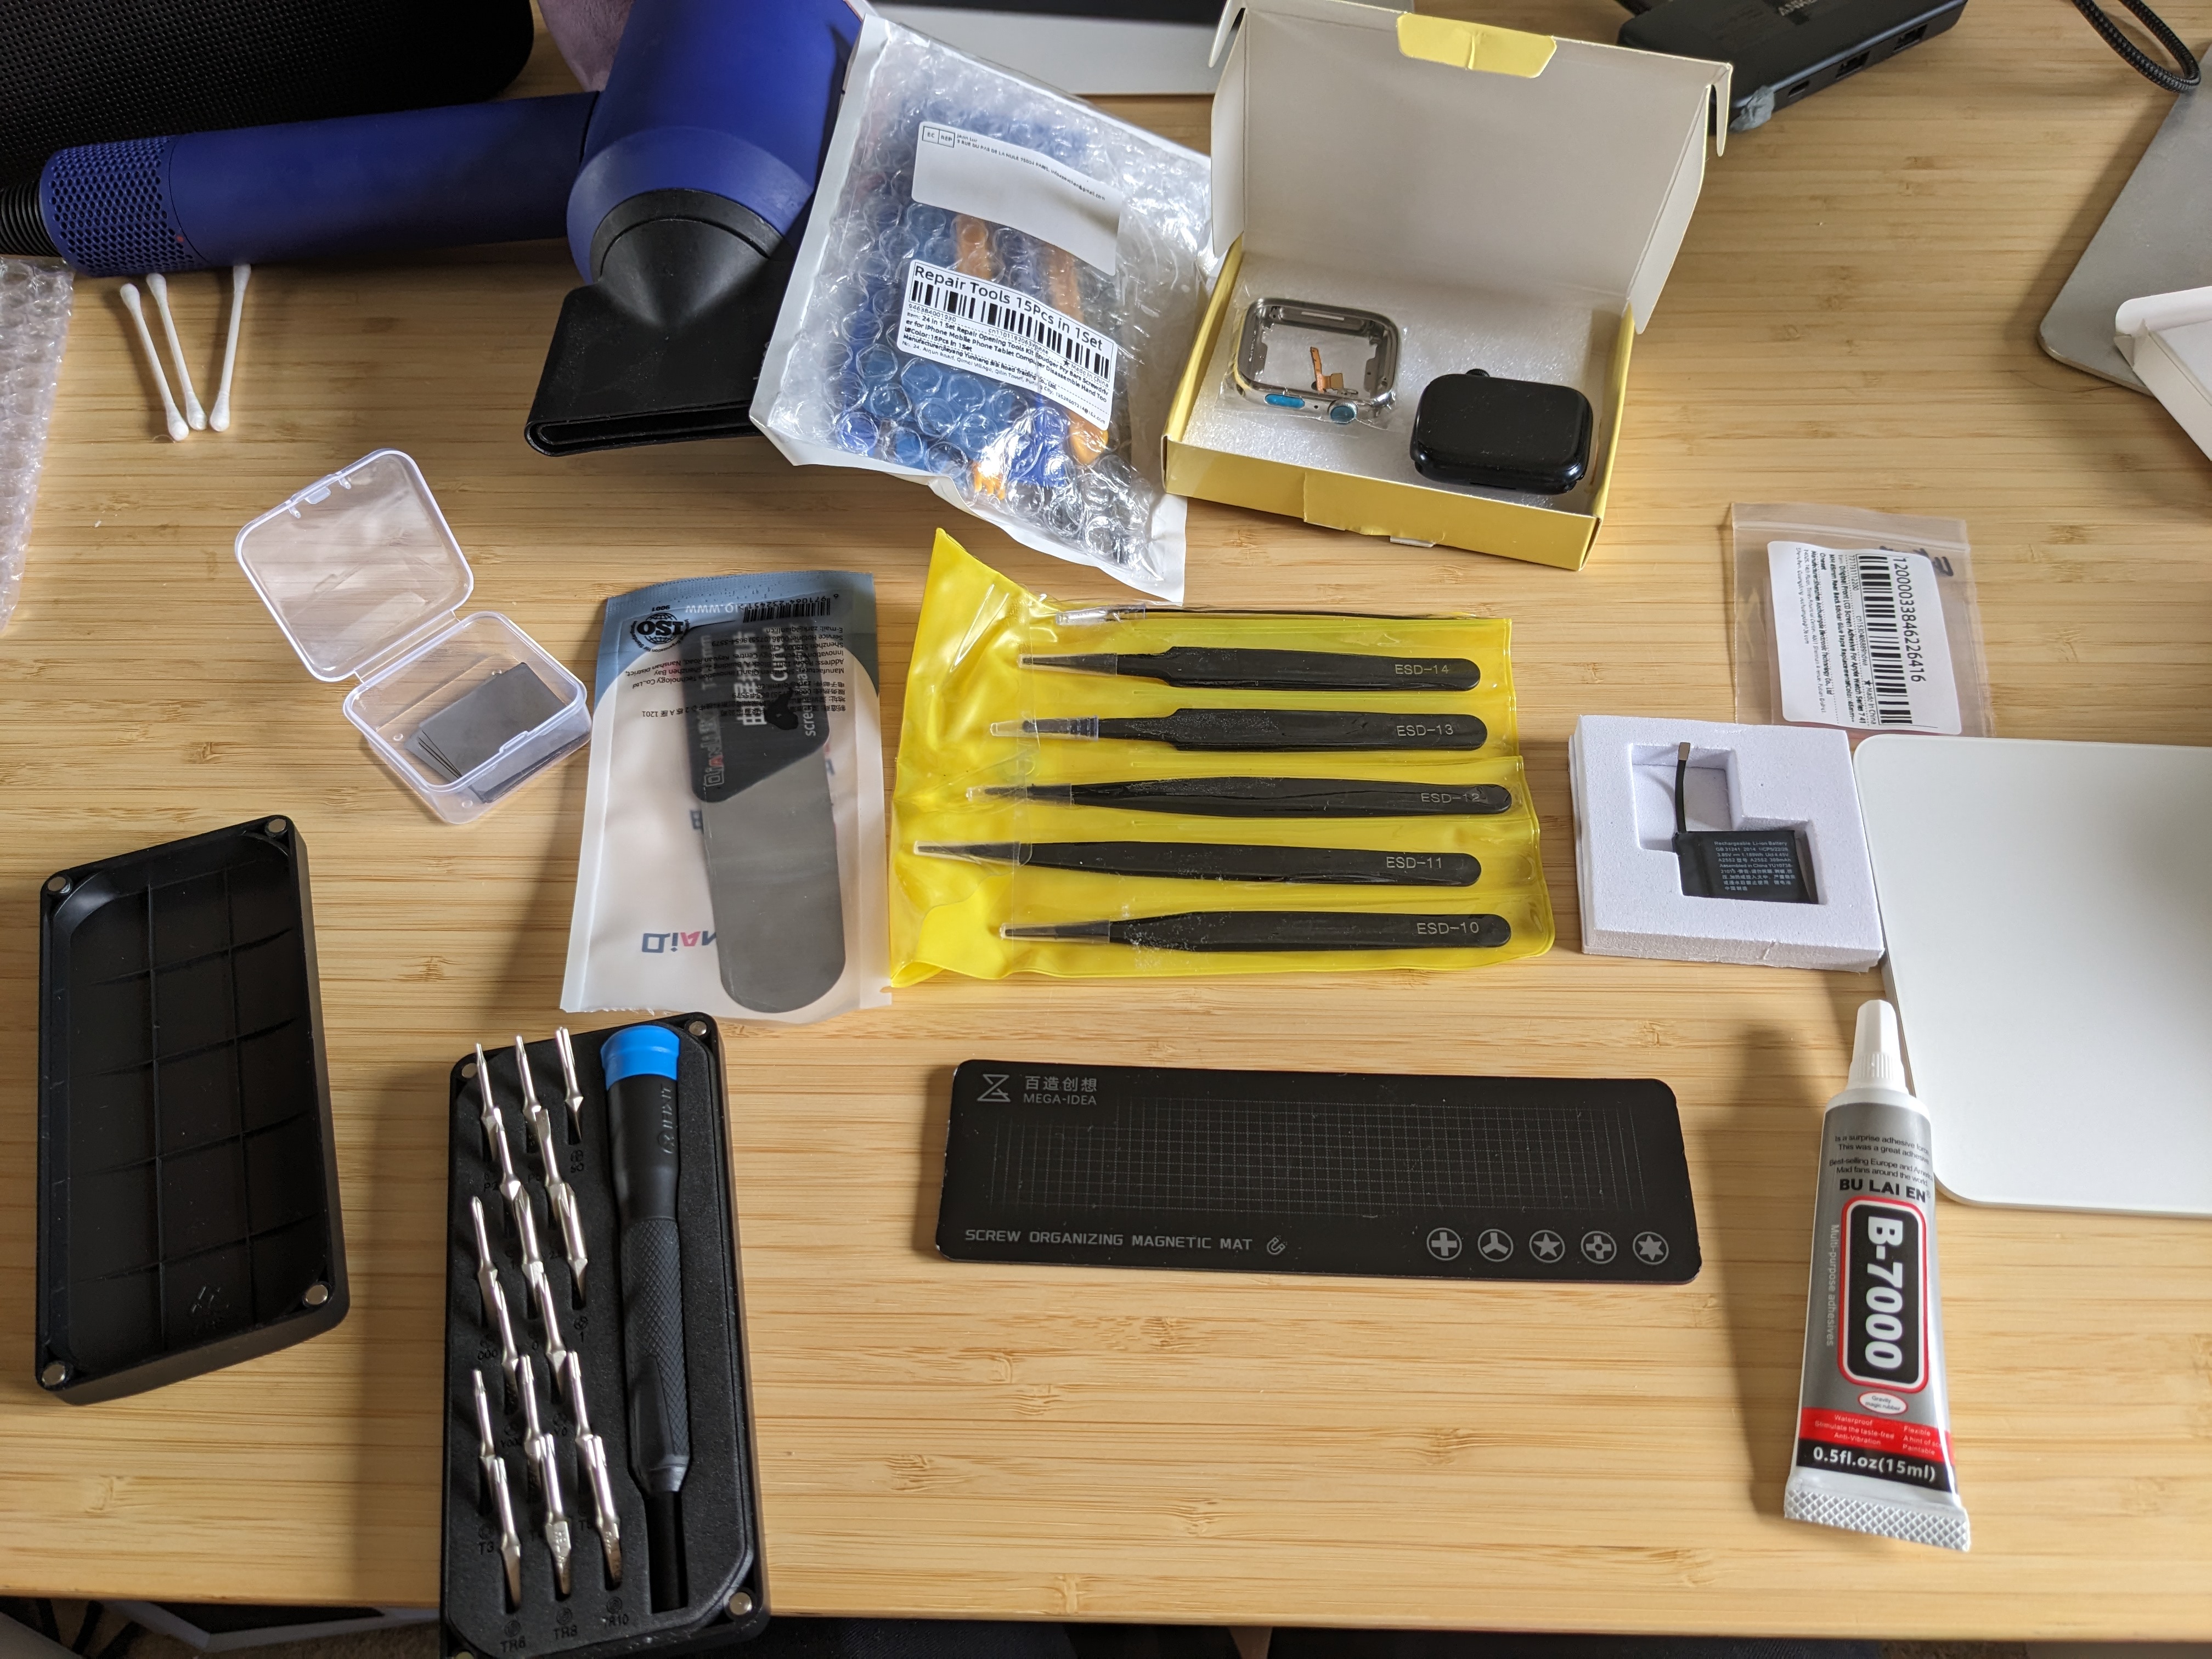
The parts and tools took around two weeks to arrive and all in all looked something like this:

- Hair dryer
- Screwdriver kit - only the triwing was used
- Curved Screen separator
- B700 Adhesive
- New Battery
- Pry tools
- Spare Watch Strap ejection springs
- Tweezers
- Magnetic Screw Mat
I started trying to disassemble the watch with the video and this is where it all started going wrong.
Initially, I tried to separate the display from the housing using the thin aluminium sheets I found on Aliexpress but I found that they were too thin and couldn’t pry the display up before bending themselves. — I don’t recommend you buy these for this mod.
I went onto the QianLi curved display disassembler and this seemed more promising.
However, whilst I was cutting the adhesive on the corner, the OLED display got damaged. When the watch had turned on after I accidentally hit the power button, I could see a green line across the screen. Oh dear.
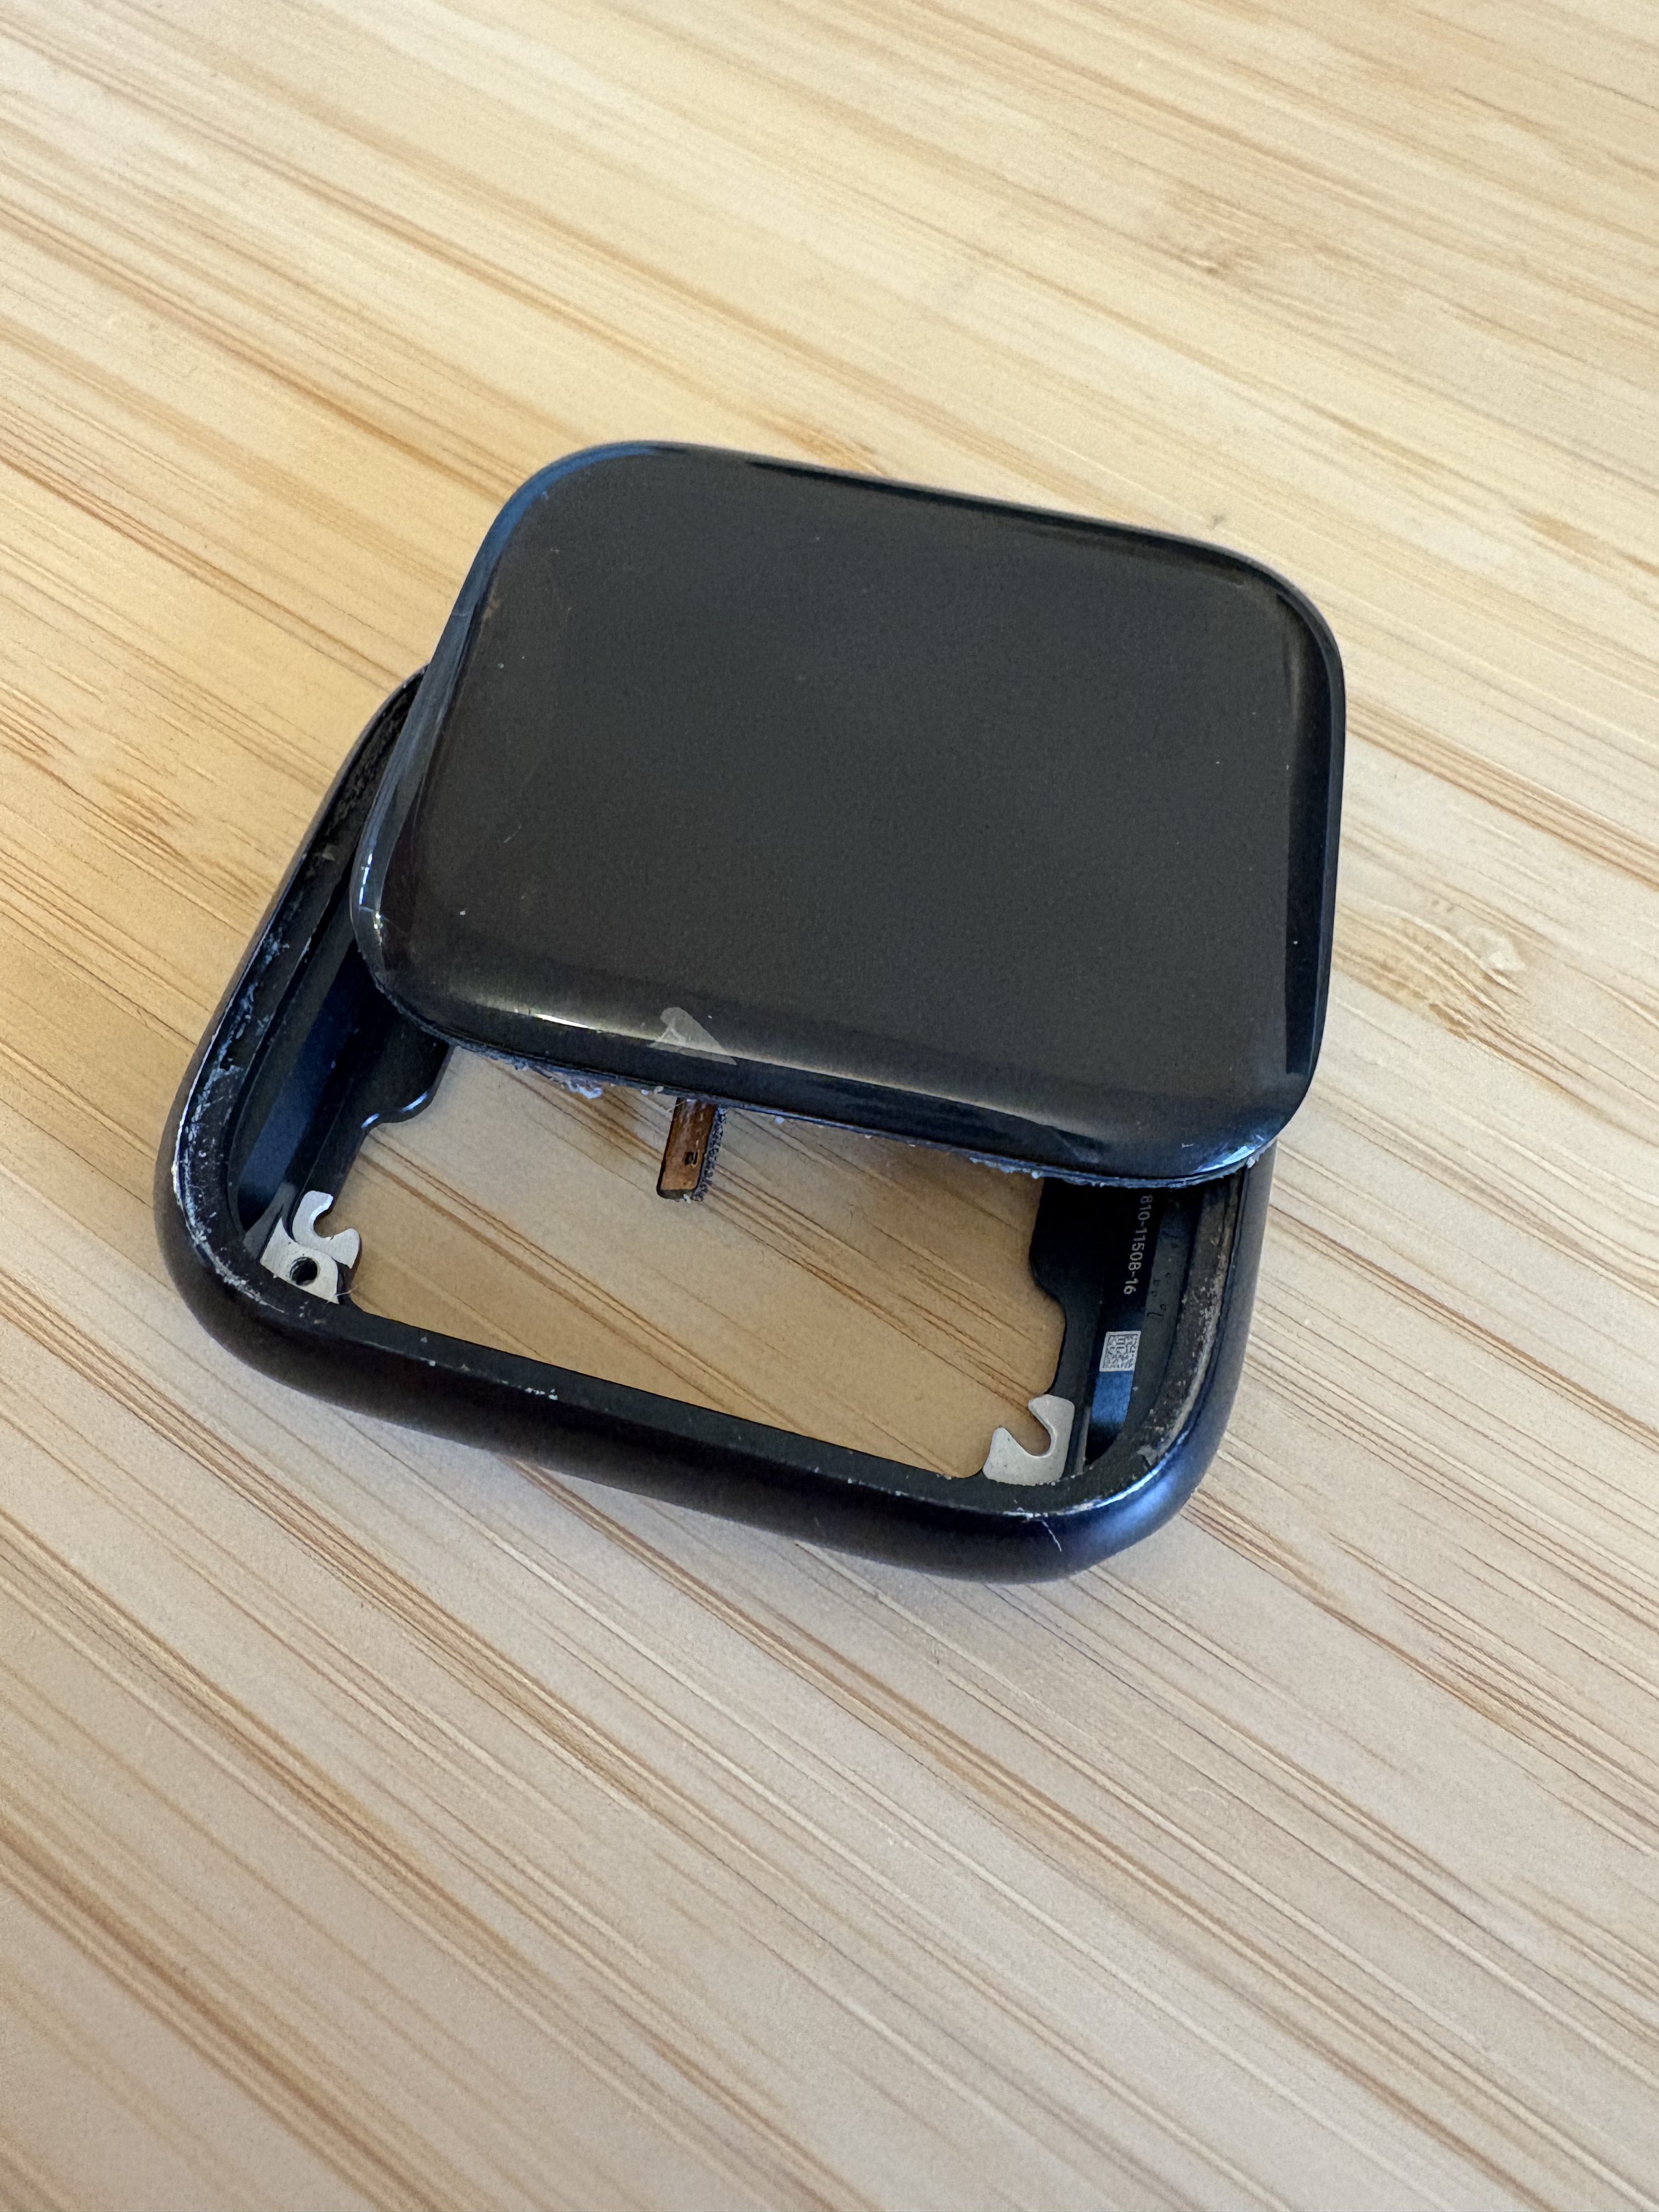
I was wondering for a while then about what to do and finally chose to decide to keep prying and to get a replacement display. This turned out to be quite the destructive tactic as seen below:

Make sure to press your curved screen disassembler straight down the frame before prying up — otherwise you are likely to only reach halfway and separate the OLED from the digitizer as I have done above (the airbubble).
I’m now waiting for my replacement display to arrive and will update you in pt.2!
Enjoy Reading This Article?
Here are some more articles you might like to read next: